> ## Documentation Index
> Fetch the complete documentation index at: https://help.unrealizex.com/llms.txt
> Use this file to discover all available pages before exploring further.
# Edit a texture with a prompt
> Paint an area and describe what should change there
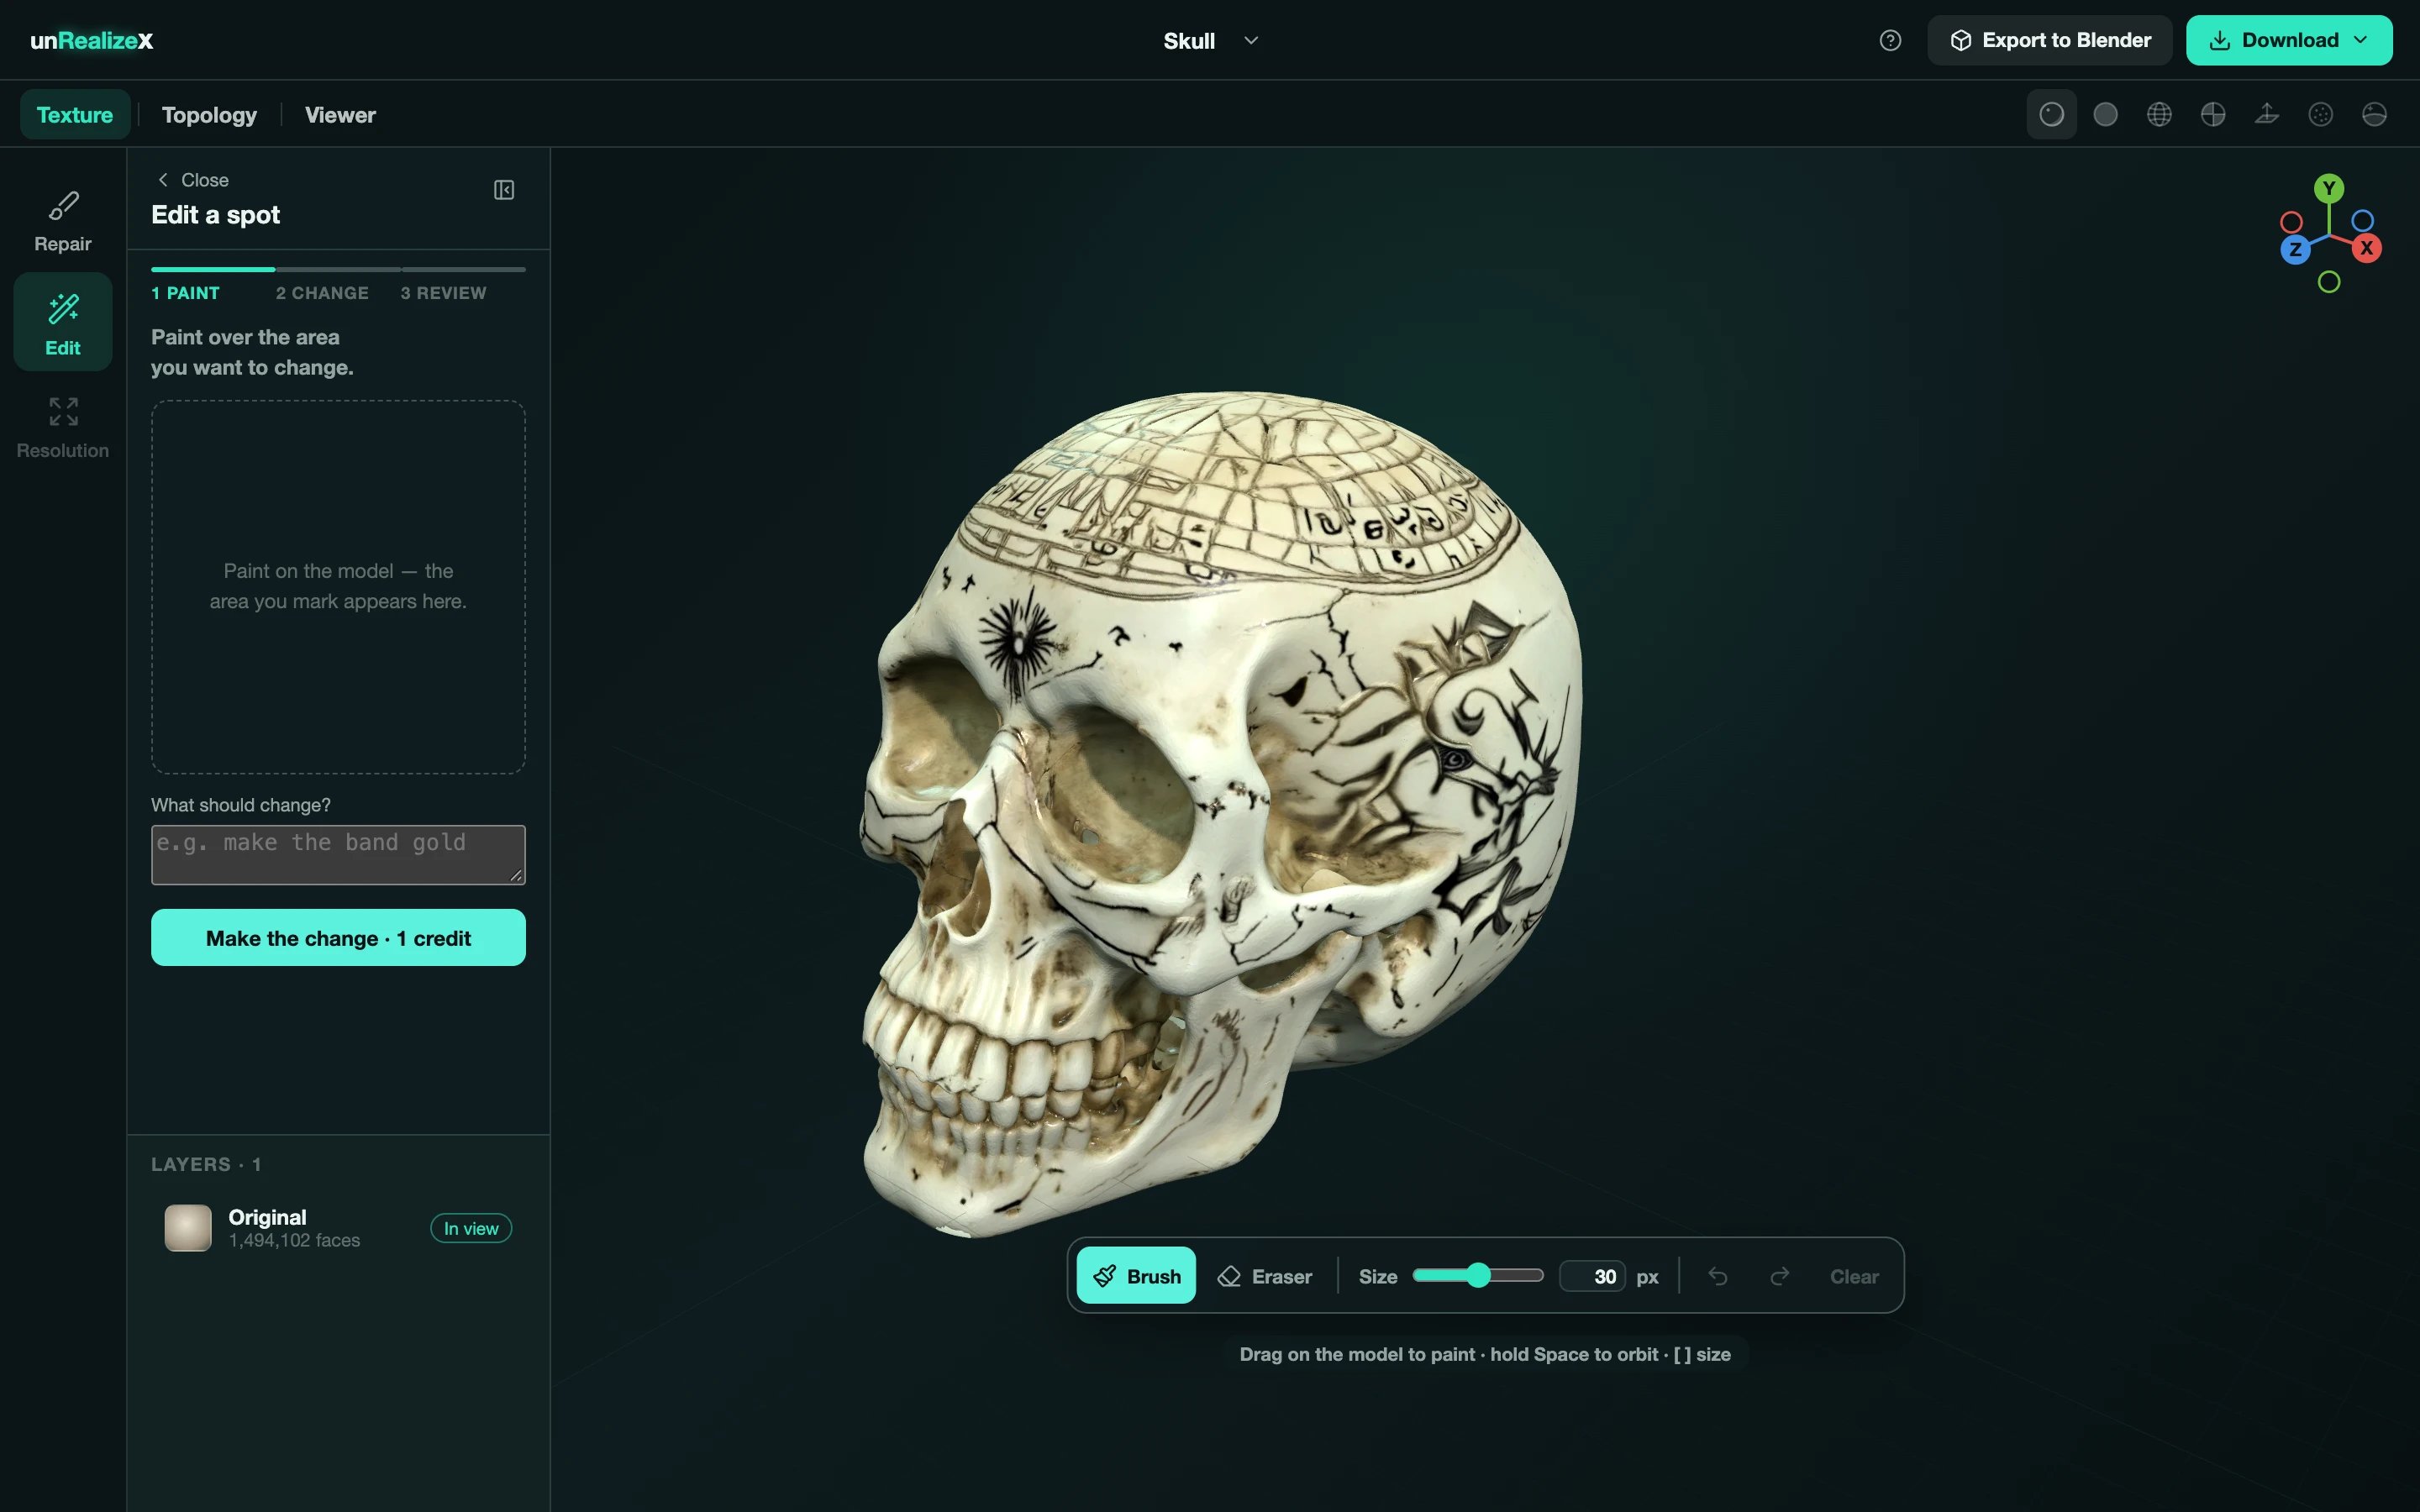 **Edit** is Repair's sibling. Instead of matching the surroundings, it changes the painted area to what you describe: a new colour, a new material, a logo removed.
Under a minute, 1 credit per run. Saving creates a new version; your original stays.
Open the model in Space, click **Texture**, then **Edit**. The panel is **Edit a spot**, with the stages **Paint**, **Change**, **Review**.
Same brush as Repair: drag on the model, hold **Space** to orbit, **\[** and **]** for size.
Type it in **What should change?**, for example *make the band gold* or *replace the blue fabric with weathered red leather*. Be concrete about colour and material.
Review the result the same way as a repair: pick an option, compare Before and After, **Apply**, then **Save changes**.
Keep the painted area tight around what should change. The tool only touches the striped pixels, so a loose selection wastes the run on areas you wanted left alone.
**Edit** is Repair's sibling. Instead of matching the surroundings, it changes the painted area to what you describe: a new colour, a new material, a logo removed.
Under a minute, 1 credit per run. Saving creates a new version; your original stays.
Open the model in Space, click **Texture**, then **Edit**. The panel is **Edit a spot**, with the stages **Paint**, **Change**, **Review**.
Same brush as Repair: drag on the model, hold **Space** to orbit, **\[** and **]** for size.
Type it in **What should change?**, for example *make the band gold* or *replace the blue fabric with weathered red leather*. Be concrete about colour and material.
Review the result the same way as a repair: pick an option, compare Before and After, **Apply**, then **Save changes**.
Keep the painted area tight around what should change. The tool only touches the striped pixels, so a loose selection wastes the run on areas you wanted left alone.